Saturday 28 September 2013

make this pattern part 2

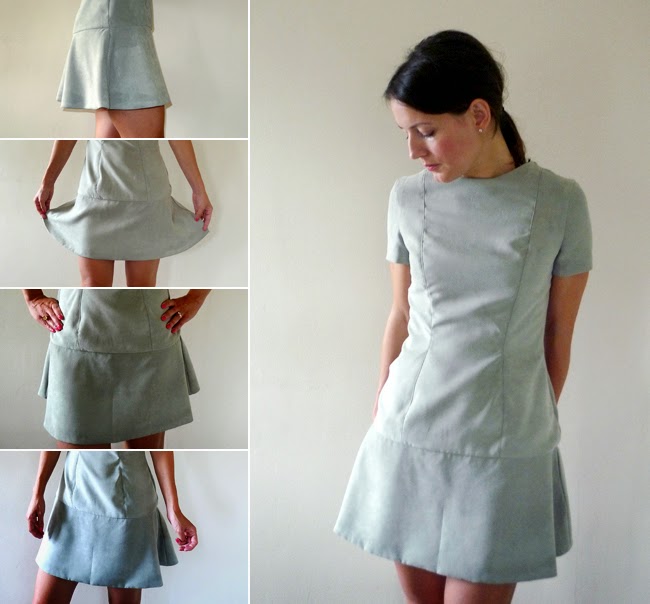
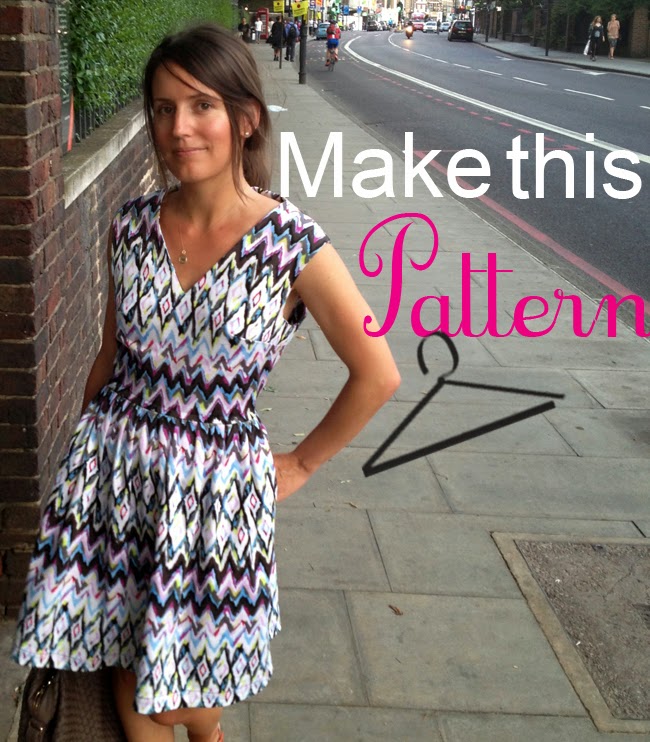
It's Part 2 of Make this Pattern for the Summer and the City dress.

Just a quick reminder - normally you would work from a block without seam allowances and add them in at the end. Since we are working from a bodice pattern that already includes 1.5cm seam allowances, we have to include them on the style lines we draw in to create the v-neck and cap sleeve.  

Here we go:

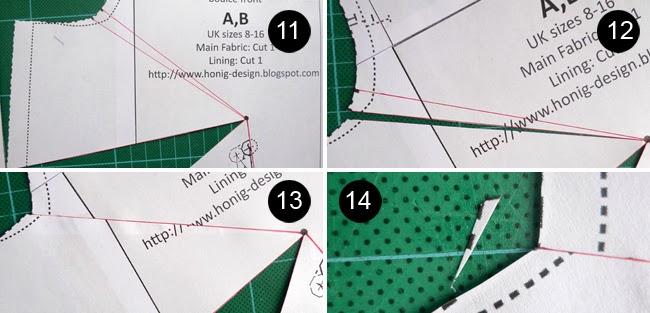
23)  a) On the bodice front, measure in 3.5cm from the neckline along the shoulder and mark. 
b) Measure 12cm down from the neckline on the centre front and mark.
c) Connect these two points with a straight line.  These measurements account for the 1.5cm seam allowance included in the pattern.  
d) Make a notch where the sewing line meets the centre front.  This is the pivot point when you sew the vneck.
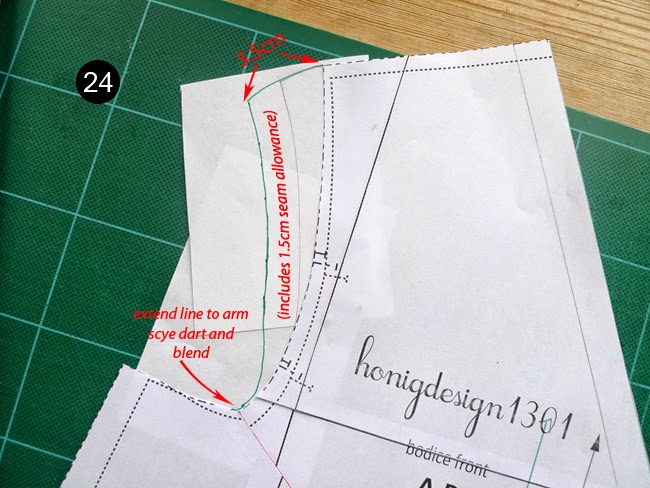
24)  a) Glue a scrap piece of paper along the bodice front arm hole, extending all the way to the side seam.
b) The shoulder of the bodice on this pattern extends out over the top of the shoulder somewhat.  Draw a slightly curved line outward from the tip of the shoulder measuring about 3.5cm (the exact length of the line is up to you, just remember that it needs to include the 1.5cm seam allowance).   This is the cap sleeve.
c)  From the end of the cap sleeve, draw another freehand line which meets the arm scye dart.  Remember that this will include 1.5cm of seam allowance.
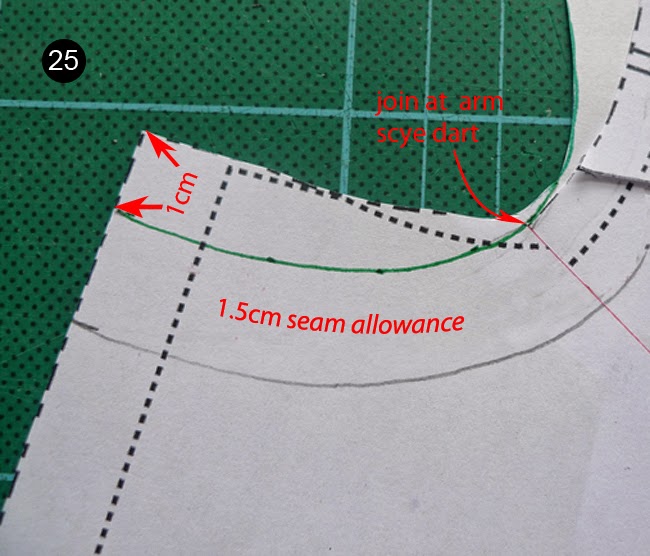
The next step is up to you.  I've dropped the arm hole a little because I prefer to wear sleeveless garments with more room in the arm. (I don't particularly like when the fabric rubs up closely against my underarm, especially for summer garments!)  I also think it works better with the v-shape of this pattern. This is totally up to you, I know many sewers feel the opposite way.
If you do want to drop the arm scye like I have here's what you do:
25) Measure 1cm down from the arm scye and draw a freehand curved line to join at the arm scye dart.
Now we have to make sure the bodice back matches wht we've done on the bodice front.
26) Measure 3.5cm from the neckline on the bodice back and draw a curved line to the centre back, dropping it slightly.
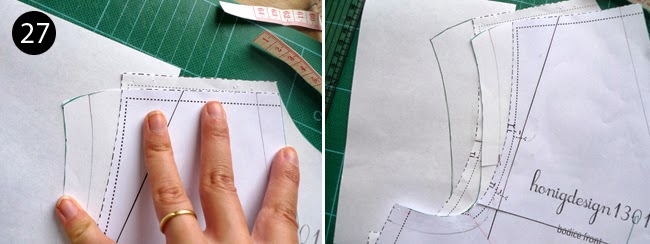
27)  a)  Glue a sheet of scrap paper along the arm hole for the bodice back.  
b)  Take your pattern for the bodice front and place it on top of the bodice back, so that the shoulder seams line up perfectly.  Trace the new cap sleeve onto the bodice back, and the line which connects to the arm scye dart, so that you have a matching front and back.
28)  If you've dropped the arm hole on the bodice front, make the same adjustment on the bodice back, measuring 1cm down.
You should now have a bodice front and back that look something like this.  
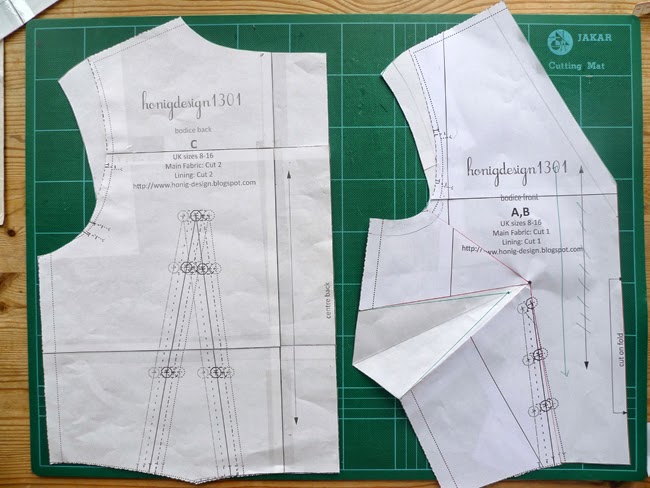
A couple of things to check:
- Measure your shoulder seams - do they match?
- Measure your side seams (excluding the dart excess on the bodice front) - do they match?

As with any garment you draft, it's really important to sew a quick muslin to see if any further fit adjustments need to be made.

Click here for Part 3 - a few tips on sewing it together, and show how I made the pocket for the dirndle skirt.


Friday 27 September 2013

make this pattern


Happy Friday!  Here's a new tutorial  for you.  A few of you mentioned that you'd like learn how to make my Summer and the City dress, so I figured out a way to show you how to draft the bodice yourself.   If you do want to make this but don't have time now, you can find it later in the "Make This" section on my blog.

Here's what you'll need:

          • base pattern (download it here)
          • glue stick / tape
          • ruler
          • scissors
          • sharp pencil 
          • tracing wheel or something pointy
          • sheet of scrap paper
          • a coloured pen or pencil is useful but not necessary

We'll do this in 2 parts:

Part 1:  Moving the waist dart on the base pattern to the side seam, and making adjustments for a sleeveless garment
Part 2:   Drawing in the neckline and shoulder cap, and repeating for the bodice back.

Here we go with Part 1.  Our base pattern has a waist dart, but we want a bodice with a bust dart at the side seam.  Here's how to move it over, and make a couple more adjustments along the way. 

1)  Print out the base pattern and cut your size.  Refer to the size chart below.  I'm working on a size 10.


Here's a quick cheat sheet on some of the terminology used below.

2)  Draw a line through the centre of the waist dart and through it.  (Make you draw exactly through the centre of the dart that corresponds to the size you cut out)
3)  Placing a ruler on that line, measure 2cm up from the tip of the dart.
4)  Mark this point.  This is the actual bustpoint for the bodice pattern and referred to from here on as the dart apex.


5)  Draw the new waist dart, joining the apex of the dart to the bottom of the dart legs for your size.  


6)  At the bodice side seam, measure 10 cm down from the arm scye and mark.
7)  Draw a line from this point to the dart apex
8)  Using scissors, cut or "slash" the left leg of the waist dart to - but not through - the dart apex.
9)  Now do the same along the newly drawn line from the side seam to the dart apex:  slash to but but not through the apex.

10) Now you have a moveable lower left corner of the bodice.  Close the waist dart by moving the left leg of the waist dart to the right leg and glue or tape securely.  This will open up the bust dart.

11)  On the pattern you've downloaded, you'll notice some small circles on the arm scye.  These represent the arm scye dart.  (I am working from a different print out and have marked these points with my pencil above.)  Draw a line from the two circles on the arm scye on your size to the dart apex.
12) Slash the lower dart leg along the line you drew, to the dart apex
13) Close the dart by moving the lower and upper dart leg together and glueing or taping the overlap in place
14) Clip away the small excess


You now have a very wide bust dart on the side seam, and you've closed the waist dart and the arm scye dart.
15) Glue or tape the new bust dart onto a piece of paper.

16)  Now we want the bottom leg to meet the top leg of the bust dart.  Make a clean fold along the lower dart leg to the dart apex, as best as possible.  Press down along the side seam so that the layers of paper are neatly folded, and the lower and upper dart legs meet each other neatly. Using a tracing wheel or something pointy (I'm using my pivot tool) punch through the three layers of paper lightly, along the side seam line.
17)  Connnect the punched dots with a pencil.
18)  Trim away the excess paper.

19)  Draw a line through the centre of the bust dart to the apex. Mark a notch 2cm down that line, to the left of the apex.  This is the new bust dart point.
20)  Draw in the legs of the bust dart by connecting the new bust dart point to the end of the original dart legs.

We have to make an adjustment for the V-neck. (If you do not want to add a V-neck, do not include this step)  
21)  Measure in one centimetre from the centre front at the neckline and mark.  Draw a long line from this point down the front of the to where the centre front meets the waist, or "zero".  Trim along this line.
22)  Draw in a new grainline parallel to the centre front.


We're nearly there - we've moved the waist dart, adjusted for the sleeveless bodice and lower neckline.  

Click here for Part 2 - How to draw in the neckline and the cap sleeve, and how to repeat this on the bodice back.

Saturday 21 September 2013

the most impractical dress ever?

It's September 21st and officially the last day of summer here in the northern hemisphere, 
and I'm sharing my last summer dress of 2013!
...the one that I didn't wear all summer.
Don't you hate when that happens?
By the time I had it stitched together, I learned rather quickly that faux suede isn't breathable...
I actually worked up a sweat just posing for these photos in the apartment...
I really had my heart set on a short leather minidress with a flouncy skirt, and it was all going rather well at first.   I managed to draft a pattern that worked with the mere metre of this faux suede I had in my stash 
(which I think cost about $2.99 at Fabricland)...
...but a light coloured minidress in a heavy fabric is possibly the most impractical item I've ever sewed.
(maybe even more than the Mary Poppins costume I wore that one time in my figure skating years)

The evidence:
- too hot / unbreathable for summer...
- ....in a springy green shade that doesn't work with tights for winter

Maybe next year I will wait for a rainy day and wear it will wellington boots.

I'd love to know - do you have a most unwearable project? Have you made something that fits, but that you physically can't wear?

Sweatin' it out