Friday 27 June 2014

The Travel Skirt

I really wish I could take credit for this one.
A couple of summers ago at home in Canada I experienced a bit of sewing serendipity.   I was in Fabricland admiring a bolt of bright flowered fabric, when an elegantly dressed "grand-mรจre" next to me (think the French Canadian version of Anne from the first series of Sewing Bee) started talking to me (in French) about the qualities of the brightly bloomed fabric.  Most importantly, she thought, it was the perfect match for a skirt she just finished sewing, and pulled out from her purse a compact bundle of accordion folded fabric.
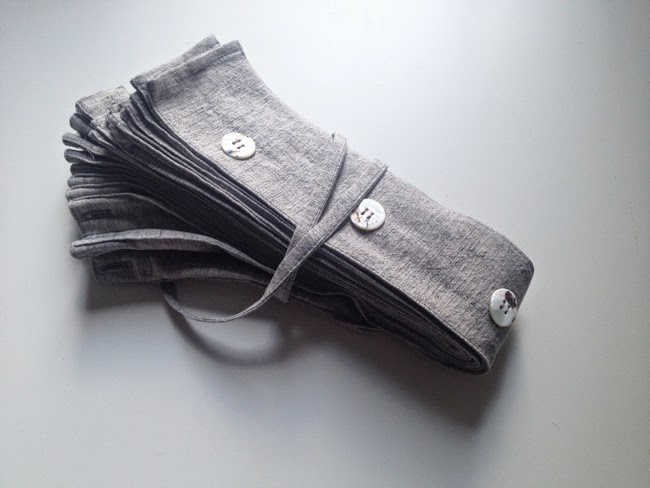
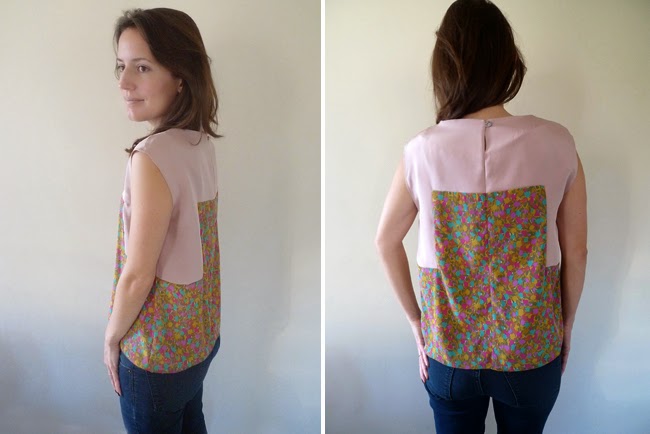
I watched in awe as mon amie carefully unfolded each panel to reveal a knife pleated linen skirt and (still oblivious to the fact that I was not bilingual) went on to excitedly list the merits of the pattern.  I used my best Grade 12 french, along with some arm and leg gestures, to learn this clever little skirt was ideal for traveling:  it folds up neatly in a suitcase, doesn't take a lot of space, resists wrinkling, is light and cool in the summer heat but slightly structured with a bit of "je ne sais quoi" about it which, of course, would look perfect with the aforementioned fabric (the flowered fabric is too loud for a dress, mon amie insisted, but would make a great blouse.  I wonder if she would approve of what it became!)
 The image of  my elegant friend and the enthusiastic way she talked about the pattern stayed with me for a long while until earlier this year I finally sat down and, with an exhaustive Google keyword search, discovered the pattern:
http://finesewing.com/index.php/how-to/3-the-travel-skirt
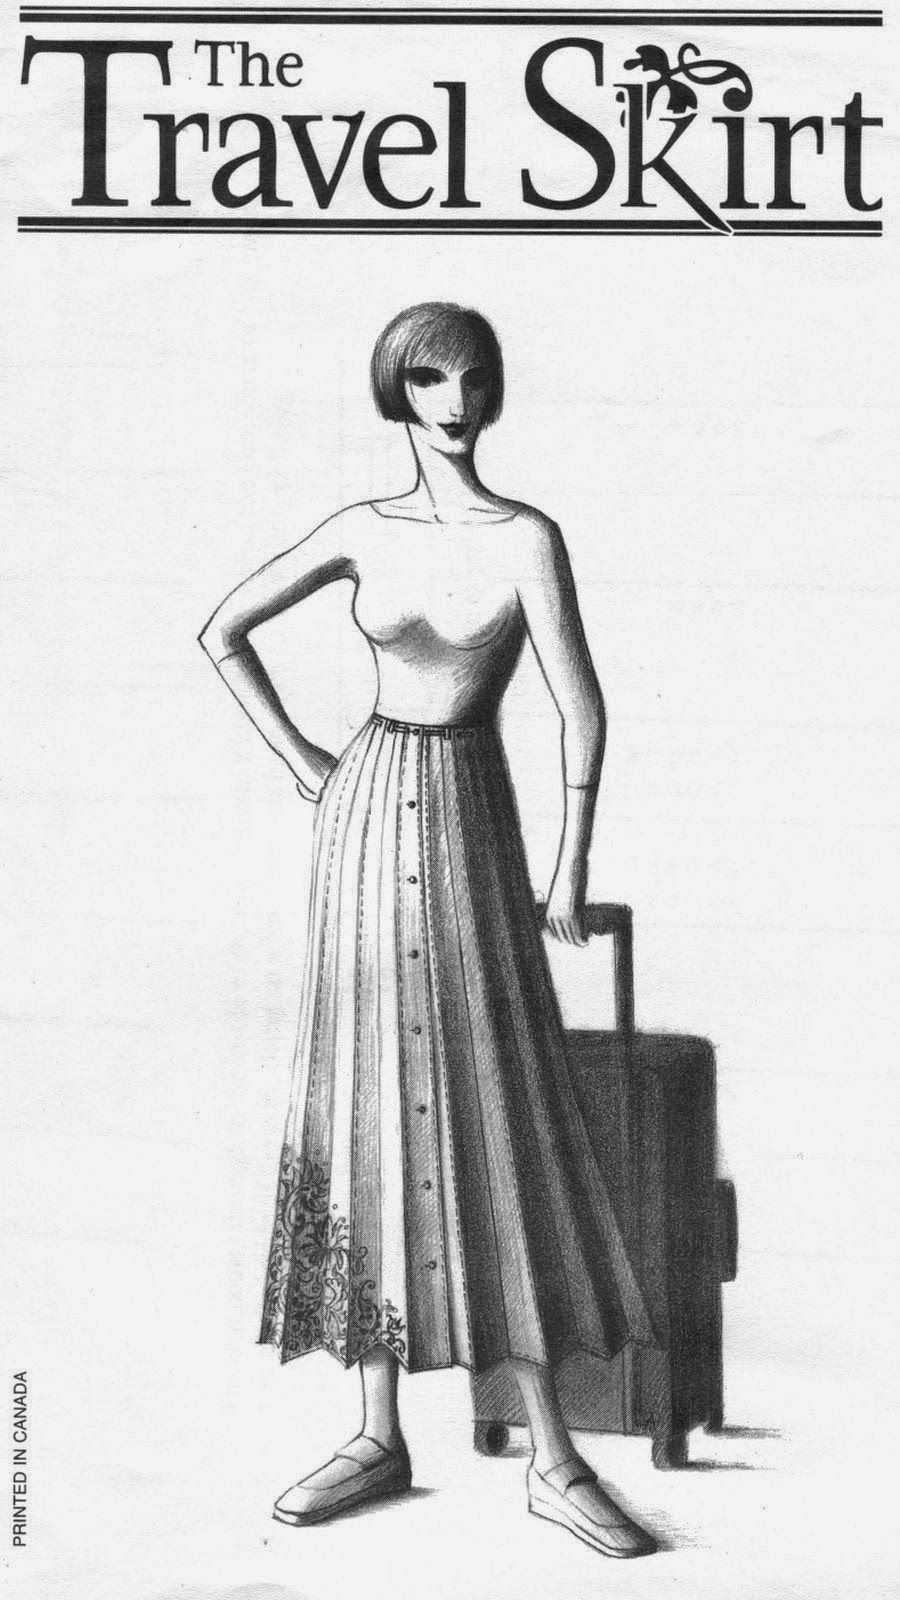
It turns out the pattern was designed by the talented and accomplished Kathryn Brenne of the Academy of Sewing and Design who, I also discovered to my delight, lives a not far from my hometown - which makes it all the more special to me.  (See Kathryn's profile in The Guardian, here)
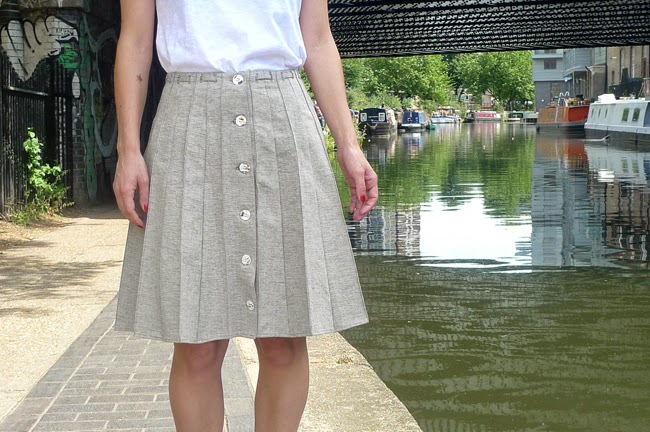
The Travel Skirt was easy and super satisfying to sew and simple to modify to your size, made up of a number of panels.  I just added an extra panel to get a perfect fit.
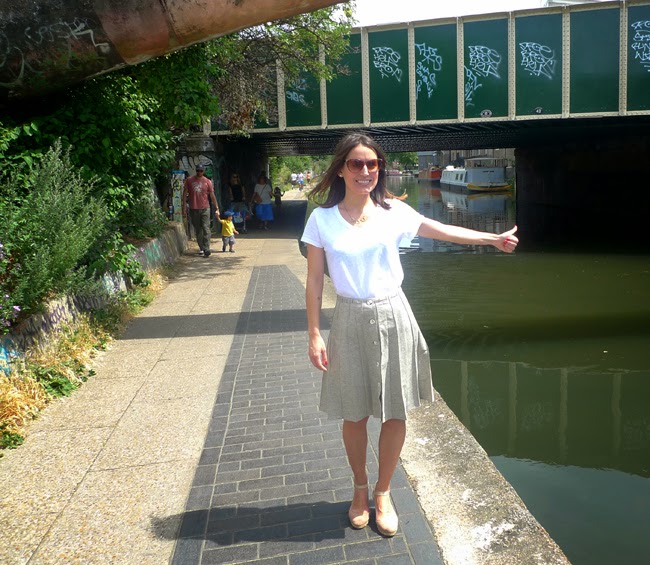
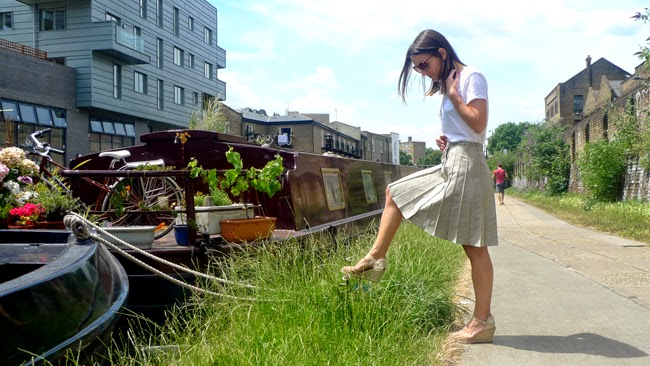
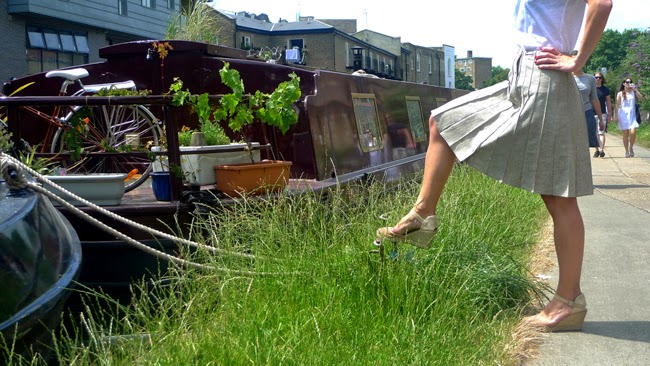
Whether you're far from home for a short or a long while, crossing cultures or crossing a canal on a slow boat, I think every seamstress needs a Travel Skirt in her wardrobe.
Bon Voyage!


Thursday 19 June 2014

the eve of summer

If you're looking for a quick sewing project this week-end to officially welcome in the northern hemisphere summer, why not try this pattern shared on Burdastyle by member ginasophia, and originally from the Japanese pattern book Nonchalant Feminine Style by Sasahara Noriko.
 I loved ginasophia's crisp white sleeveless version so much I made mine exactly the same, with the help of some soft oxford shirting from Ray-Stitch 

 Happy summer and happy sewing!

Wednesday 11 June 2014

cutting corners tutorial

Hello everyone!
Here's a quick tutorial I put together before the Big Move and never had a chance to post.  It's a how-to on sewing corner pieces together - have you tried this?  
I didn't even realise that I didn't know how to sew corners like this, until I sewed myself into one  (more mentally, than physically) and was rescued by a brilliant sewing instructor who showed me the way out of my right-angle traffic jam... and then the possibilities opened up.
 For this tutorial, Fabric 1 is the flowered fabric and Fabric 2 is the pink fabric.
See diagram below:
*Lay Fabric 2 face down on top of Fabric 1 (right sides together).  
*Match the edges of the first seam you are going to sew. (Here, the top edge of Fabric 1)  
*Stitch down the length of your first steam and stop at a pivot point, where the two corners diverge
*When you get to the pivot point, drop your needle in the fabric and lift your sewing machine foot.
*With scissors, snip the top fabric only (Fabric 2) close to the needle, but not all the way through to the needle.  
*Pivot both pieces of fabric clockwise 90 degrees, so that the second stitch line is in sewing position.  Open the top fabric (Fabric 2 - the one you just snipped) and pull it around clockwise so that it matches the edge of Fabric 1.
Don't overthink this -- as my wise sewing instructor said, "it will be obvious!"
*Sew down the length of the second seam.
It's really worth practicing this a few times before you try this on your favourite fabric.  
I got a little impatient on this blouse and didn't do a few practice runs first...with this there's really no going back!
This is a handy little trick when you have two pieces of fabric, neither big enough to be a blouse on their own.  Simply draw seamlines onto an existing pattern, add seam allowances and stitch together as above.

Happy Sewing!